Thursday, June 30, 2011

Interior

I think this is a good color scheme.


I found a guy who will make me an entire set of interior upholstery (not sure if that includes curtains... no matter, those are easy enough to make) for like $350 if I give him the fabric. Worth it? I think so. I wonder how much fabric he needs. This stuff is $39/yard from Wolfsburg West... Wonder if it would be too matchy with the astro-turf carpet I plan to put in??


Monkey Shit

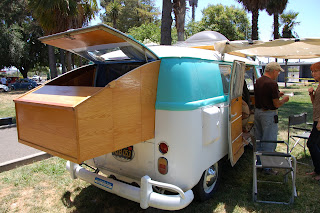
I met a guy named Ferdinand at the VW show over the weekend and he introduced me to this stuff. He is pictured with the light blue split-window bus in my photos below and has taken his bus up to the arctic circle.

This compound never hardens but is a sealant/adhesive and he suggested it for attaching patches in the floor once I've ground out, primered and painted the rust spots. I like that idea.

It's called Butyl Putty Tape, but he only knew it by the name "Monkey Shit" so I had to do some internet research to find out what it's really called. It looks like this:


And it can be purchased here... http://www.vintagetrailersupply.com/Butyl_Putty_Tape_p/vts-419.htm

Wednesday, June 29, 2011

Headliner


I would like to make a nice new headliner like this...
They use birch plywood, I think 1/8" thick. Probably requires a lot of sanding and a nice satin varnish.

Camp Stove

The "Coleman PerfectFlow Insta Start Grill Stove" what a name.


I'd like to use this stove in the bus, and build a wooden mount for this which could affix to the top of the sink to allow for a full camp kitchen. I like the idea of a grill with a burner for cooking. Will probably need to put some metal flashing stuff on the headliner above the stove, but given its proximity to the sliding door, ventilation shouldn't be a problem.

Monday, June 27, 2011

ORDERED

I was going to order this from CIP-1 as suggested by someone on The Samba, however, on CIP-1 the part was $6 but shipping was $10! So I ebayed it on up and saved a few bucks for the same thing. And may have found a new parts supplier in the process.
Update: Within moments of ordering this part, I saw that the seller had one listed for my model of Bus as well (notice it says for the Bug on the screenshot above), so I sent him a message asking if the two parts were the same, and if not, could he please send me the one for the Bus instead. Moments after I sent that message, I saw on my invoice that my shipping address was 2 years outdated and I no longer lived in that part of the state, let alone at that address. So I sent the seller another message asking to send it to my current address. We will see if either of these requests are granted. What a n00b.


Exhaust


I don't know if this is the right thing, all I know is my muffler is rusted as heck.


UPDATE:

This is more like it, and the price is right...
http://www.jbugs.com/product/3487.html?Category_Code=vw-bus-mufflers-and-header-systems-1963-1971

Sunday, June 26, 2011

Fuel Tank Outlet Kit

The name of the piece is a Fuel Tank Outlet, I guess. It's a kit like this:

Only I need it for the 1969 Bus and it shouldn't have a big bend in the tube like that.

California Bug Bash 2011

Mom and I went to the California Bug Bash VW show in Vallejo this afternoon at the Solano County Fairgrounds. We got there a little late, but met some nice people and saw some cool VW's. Here are some pics...


Step by step


It seems like even the most simple of tasks ends up compounding into many intricate steps, any one of which can halt the entire project. Today is no exception.

I was able to put the fuel input tube (don't know what it's actually called) back into its spot behind the gas door, after I soaked it in vinegar to melt off the rust. There is still a film of rust, I expect that it will just require several fuel filters to clear it all out once reassembled.

I should have taken a picture of it before I put it back in, but these are the top-down and bottom-up images of the piece, as installed.

Next, I was going to get the gas tank ready to install. I wanted to put in the sending unit (that I described a few days ago), but as I examined the gas tank, I noticed the spout that the gas flows out of to get to the carburetor looked gummy. So I blew into it, expecting to be able to blow through it, but it was completely clogged. Previously I re-sealed the interior of the gas tank, and the sealing chemicals also sealed up the spout.
I removed the spout and was able to drive a nail through the hole to break open the seal, but it is still partially obstructed. I now am not sure whether to buy a new part or to carry on with the obstructed piece. I think to be safe, unless I am explicitly told otherwise, I will buy a new part. The spout is hidden behind the engine and a removable panel once the whole thing gets reinstalled, so I would hate to have to pull out the engine again just to replace this tiny, cheap part.


Thursday, June 23, 2011

Design mock up

This is kind of what I expect it to look like eventually...

MOAR PICXZS

The view from the driver's seat... Good thing it wasn't moving because it would run right into that fence.
The canvas is in need of a little repair. i.e. total replacement. In due time.

See it's not totally destroyed, it could be temporarily patched, but uh probably not worth it.

The plan is to take the fiberglass roof off, tear out the canvas, take the bus in for new paint and new rubber seals all around, then while it's getting painted, refinish the fiberglass and when it gets home reinstall the pop top with new canvas.
Here is another problemo... Rust under the driver's-side floor mats. There are replacement floor pan pieces, but I might just try to grind down the rust and see if I can get some patches tack-welded in.
Electrical. This looks totally not screwed up. owait. the opposite of not screwed up.
Here is Sting, evaluating the problem with the junker engine (not the good one). Sting, here is a tip: the problem is that it's been rusting outside for 8 years.
He's thinking. Or maybe he saw a bird.
Someday, these two will join me on a road trip along the coast.
This concludes the first pictorial tour of the bus.

Some Photos of the bus

Here's some closeups of the dash, a shot of the cab area, the air cleaner, you can also see the rust holes under the battery tray, the condition of the fiberglass pop top and luggage rack, broken louvered window and rust under the windshield...